Contact Us

Use the form on the right to contact us.

You can edit the text in this area, and change where the contact form on the right submits to, by entering edit mode using the modes on the bottom right. 

2210 Haines Avenue
Rapid City, SD, 57701
United States

605-341-5044

Someone's In the Kitchen is an independent, gourmet kitchenware store in Rapid City, South Dakota. We are your shop for "all things kitchen". Enjoy a leisurely shopping experience in the world of kitchen and home.

RECIPE ARCHIVE IV

Filtering by Tag: onions

Hot Dog Bar

Lia Soneson

 
HotDog_Bar_v2_01.jpg

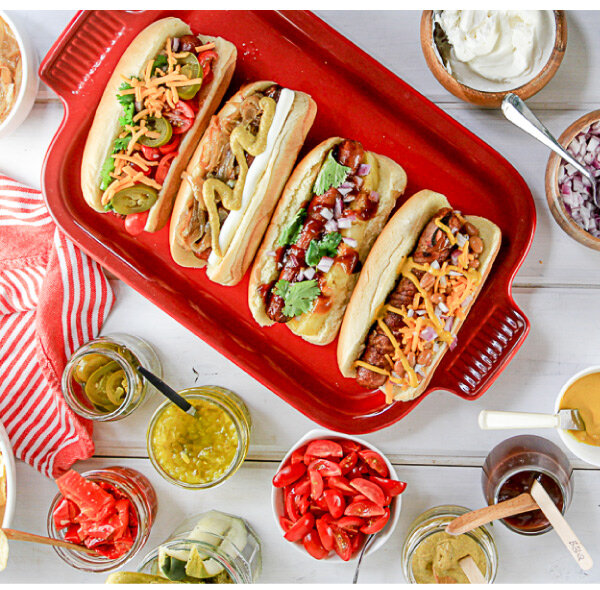
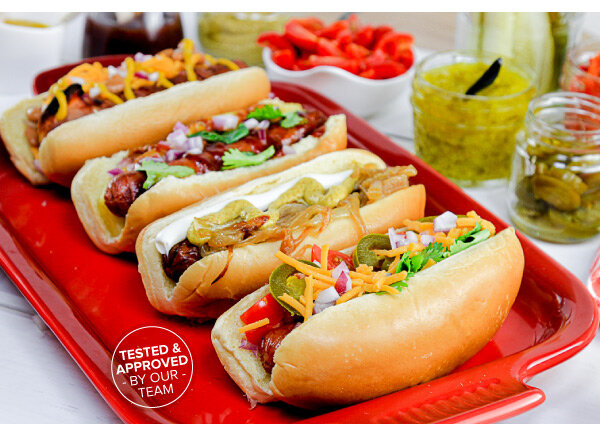
A hot dog is a fine thing, BUT, a bacon-wrapped hot dog paired with a packed hot dog bar is an experience that’s anything but ordinary. Fire up the grill! There’s an entire summer season ahead — and you’ve got some serious eating to do!

Summertime Hot Dog Bar
Serves 4

Basic Ingredients:
8 hot dog buns
8 all beef hot dogs
8 pieces thin-sliced bacon
16 toothpicks, (soaked for 30 minutes)

Optional Condiments:
Ketchup
Yellow Mustard
Spicy Brown Mustard
Cream Cheese
BBQ Sauce Hot Sauce

Optional Toppings:
Dill or Sweet Relish Onions, caramelized
Spicy Marinated Peppers
Jalapeño Peppers
Pineapple Spears
Red Onion, diced
Baked Beans or Chili Beans
Cheddar Cheese
Pickle Spears

Directions:
1. Soak toothpicks in water for 30 minutes before grilling.

2. Wrap the hot dogs with a slice of thin-sliced bacon. Secure the bacon on each end with a soaked toothpick.

3. Grill the bacon-wrapped hot dogs on a well-oiled grill over medium heat. Turn the dogs as needed to cook the bacon until it’s crispy on all sides. The bacon will take longer to grill than a plain dog, so plan on watching and turning the dogs carefully until the bacon is cooked evenly on all sides.

4. Once you’ve flipped the hot dogs and the bacon has cooked on the top and bottom, the bacon should be secure enough around the hot dog to remove the toothpicks. Carefully remove the toothpicks and grill the other two sides until the bacon is fully crispy on all sides. Get creative with the toppings! Two of our favorite hot dog toppings are caramelized onions paired with a thick stripe of cream cheese. From there, go with the other condiments as desired. The cream cheese, not a common hot dog addition, is nicely decadent -- try it, you might love it, too!

Try one of these tasty combos, or make up your own signature hot dog:
West Coast Vibes: Cream Cheese + Caramelized Onions + Spicy Brown Mustard + Pickled Hot Peppers
Cowboy Dog: Bacon-wrapped dog with Baked Beans + Cheddar Cheese + Mustard + Red Onions
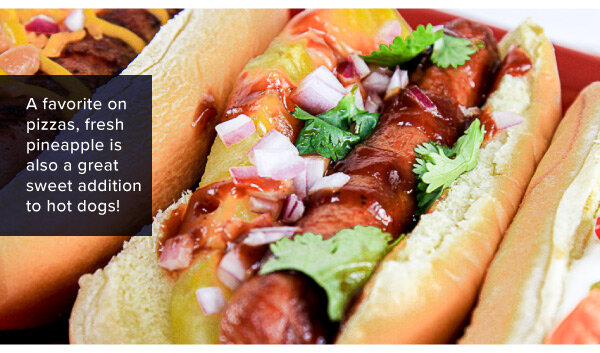
Island Style: Pineapple Spear + Cilantro + Red Onion + BBQ Sauce
Taco Time: Tomatoes + Cilantro + Cheddar Cheese + Pickled Jalapeño Slices + Hot Sauce
Classic Dog: Relish + Ketchup + Mustard


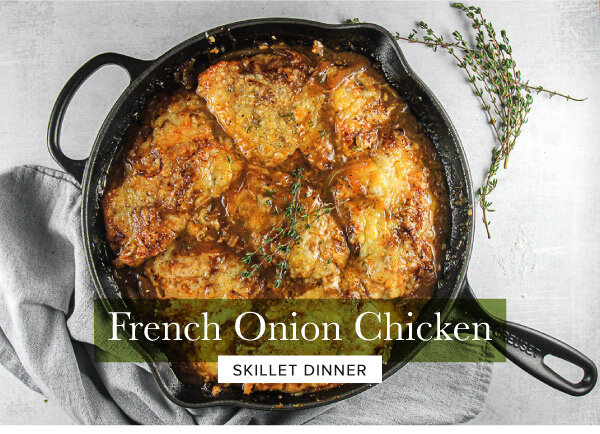
French Onion Chicken Skillet Dinner

Lia Soneson

 
French_Onion_Chicken_V2_01.jpg

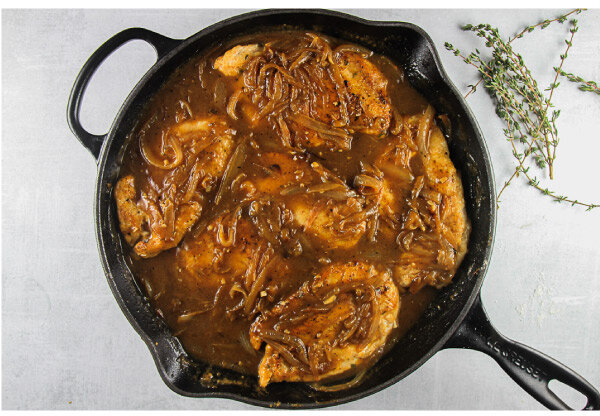
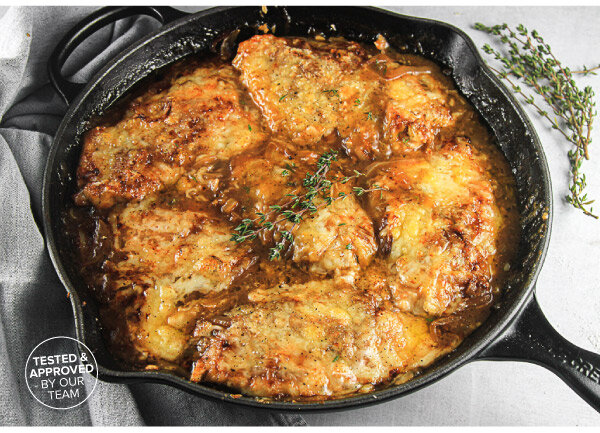
This chicken dish features a rich pan sauce, loads of slowly caramelized onions, and bubbly, broiled cheeses on top - oh my! Even better, this savory dish is prepared in one large skillet. This French Onion Chicken Skillet Dinner is likely to become a new family favorite.

French Onion Chicken Skillet Dinner
Serves 4 - 6

Ingredients:
4 tablespoons butter
2 large sweet onions, cut pole-to- pole, Lyonnaise style strips
1 teaspoon sugar
2 cloves garlic
6 thin cut skinless, boneless chicken breasts
For dusting chicken: 1/4 cup flour, 1/2 teaspoon Kosher salt, 1/4 teaspoon pepper, 1 teaspoon fresh thyme leaves, 1/4 teaspoon paprika
2 tablespoons flour, for thickening the sauce
1/4 cup white wine
1 cup beef broth
6 sprigs fresh thyme
Kosher salt
Freshly ground pepper
1 teaspoon Worcestershire sauce
8 oz Gruyère or Swiss cheese, shredded
4 oz Parmesan cheese, shredded

Directions:
1. Using a large oven-proof skillet or braiser melt the butter.

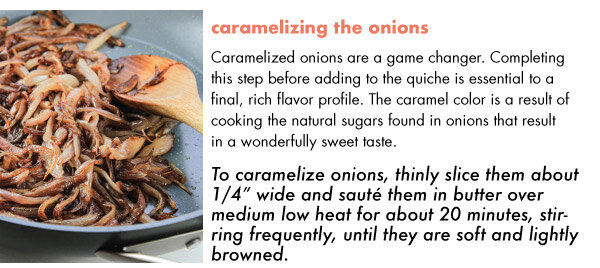
2. Add the sliced onions and cook over medium-high heat. Stir the onions every few minutes, then turn down the heat. Continue to cook the onions until they begin to turn a nice brown color. Turn the heat lower, as needed, to prevent the onions from burning. Caramelizing onions fully takes time! A true caramelized onion takes about an hour, but for this recipe giving the onions 25-30 minutes to reach a tender, caramelized state works well. Sprinkle the onions with 1 teaspoon of sugar to help with the process. To help the onions caramelize slowly, let them sit in a little pile, then stir once or twice about every 5 minutes.

3. Once the onions have caramelized, add the garlic and sauté for another 2 minutes until fragrant.

4. Remove the onions from the pan, and set aside to brown the chicken.

5. Lightly coat the chicken breasts in the flour, salt, pepper, paprika, and thyme mixture until dusted on both sides. Add up to 4 additional tablespoons of butter or olive oil while cooking the chicken to prevent sticking.

6. Brown the chicken on both sides and cook until about 150 degrees F, but not all the way done. Remove the chicken from the pan.

7. Add the onions back to the pan, and then sprinkle with 2 tablespoons of flour. Stir until coated. Add the wine, and reduce down. Add the beef broth and Worcestershire sauce, and stir until a sauce is formed. Once the sauce has thickened slightly, add the chicken breasts back in.

8. Turn the oven to broil. Sprinkle the chicken breasts with the Gruyère and Parmesan cheese and then broil until bubbling and golden brown and the chicken reaches 165 degrees F.

9. Garnish with fresh thyme leaves.

10. Serve with a side of kale Caesar salad, a side of roasted vegetable, mashed or baked potatoes, egg noodles, pasta, or cauliflower rice.


Grilled Chicken 3 Ways

Lia Soneson

 
Chicken_3ways_v2_01.jpg

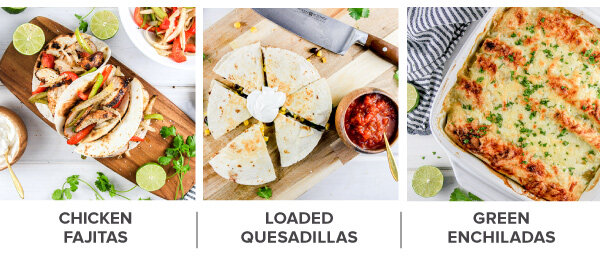
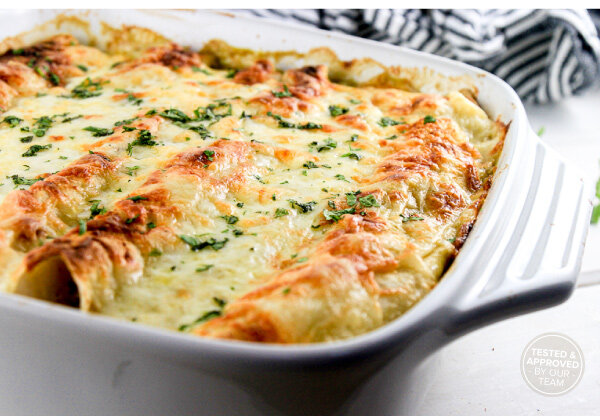
Let's make dinnertime easier! Prepare a big batch of marinated and grilled chicken breasts and then transform that chicken into three delicious meals. IN THIS ISSUE, we feature three easy recipes using grilled chicken - fajitas, quesadillas, and green enchiladas.

Garlic & Lime Grilled

Chicken Garlic & Lime Grilled Chicken:
6 chicken breasts - some now, some later 

Marinade:
1 tablespoon lime zest (about two small limes)
2 tablespoons chili powder
2 tablespoons garlic powder
1 tablespoon paprika
1 tablespoon cumin
1 tablespoon sugar
1 teaspoon pepper
1 teaspoon Kosher salt
1/2 cup vegetable oil
2 tablespoons fresh lime juice

Garlic & Lime Grilled Chicken Directions:
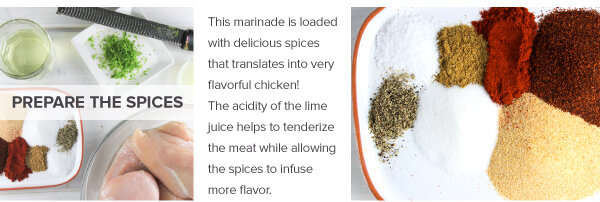
1. In a small bowl, combine the lime zest and the marinade spices: chili powder, garlic powder, paprika, cumin, sugar, pepper, and salt. Stir together until evenly mixed.  

2. Place the chicken breasts in a large bowl or in a sealable bag inside of a large bowl. 

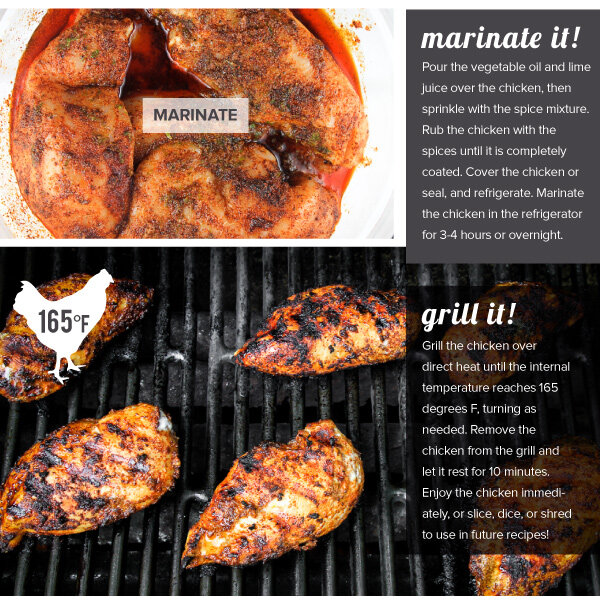
3. Pour the vegetable oil and lime juice over the chicken, then sprinkle with the spice mixture. 

4. Rub the chicken with the spices until it is completely coated. 

5. Cover the chicken and refrigerate. Marinate the chicken in the refrigerator for 3-4 hours or overnight. 

6. Fire up the grill! Heat the grill; ensure your grill grates are clean and well-oiled. 

7. Grill the chicken over direct heat until the internal temperature reaches 165 degrees F, turning as needed. 

8. Remove the chicken from the grill and let it rest for 10 minutes. 

9. Enjoy the chicken immediately or slice, dice, or shred to use in future recipes.

Chicken Fajitas
Serves 4 

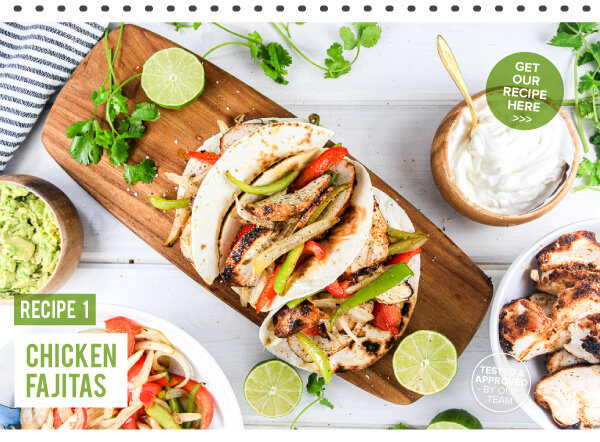
Fajitas are a colorful, delicious, and healthy option for getting dinner on the table quickly! With the chicken already marinated and grilled, simply grill onions and peppers to add to the chicken. Complete the tasty fajitas with an array of toppings! Some of our favorite fajita toppings include sour cream, cilantro, salsa, hot sauce, a squeeze of lime, salsa, and a little guacamole! 

Fajitas:
2 chicken breasts (marinated, grilled, and diced)
4 flour tortillas, warmed
1 red pepper, sliced into strips
1 green pepper, sliced into strips
1 sweet onion, sliced pole to pole
2 tablespoons olive oil
1/2 teaspoon Kosher salt
1/2 teaspoon pepper 

Toppings:
Sour cream,  Avocado,  Lime wedges,  Fresh cilantro leaves,  Salsa, and/or hot sauce  

Directions:
1. Prepare the chicken breasts according to the Garlic & Lime Chicken directions above. 

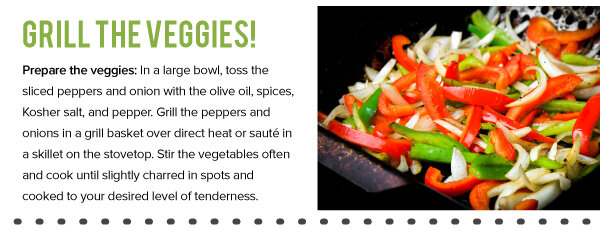
2. Prepare the veggies. In a large bowl, toss the sliced peppers and onion with the olive oil, Kosher salt, and pepper. Grill the peppers and onion in a grill basket over direct heat or sauté in a skillet on the stovetop. Stir the vegetables often and cook until slightly charred in spots and cooked to your desired tenderness. 

3. Toss the cooked vegetables with the grilled chicken slices.

4. Serve with warmed tortillas and a variety of your favorite toppings.


Loaded Chicken Quesadillas
Serves 4 

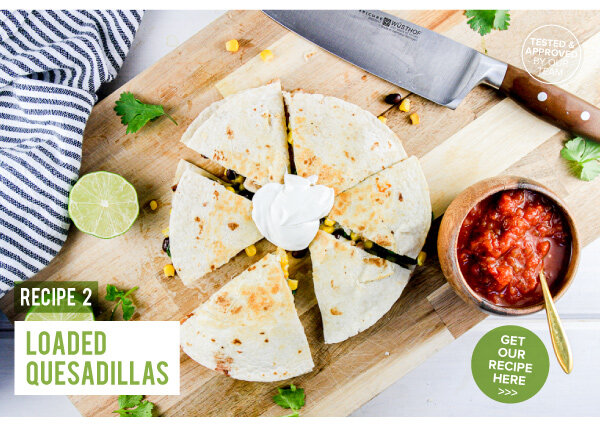
These quesadillas are loaded with grilled and diced chicken, black beans, spinach, corn, and plenty of cheese. We love quesadillas for lunch or dinner. Everyone can customize their order to their own preference. Add additional flavor with a variety of toppings! 

Quesadillas:
2 chicken breasts (marinated, grilled, and diced)
8 tortillas
8 oz pepper jack cheese, grated
1 can (15 oz) black beans, rinsed and drained
8 oz frozen corn, thawed
4 oz spinach leaves 

Toppings: 
 Sour cream,  Avocado,  Lime wedges,  Fresh cilantro leaves,  Salsa,  Pickled jalapeños,  Hot sauce 

Directions:
1. Prepare the chicken breasts according to the Garlic & Lime Chicken directions above. 

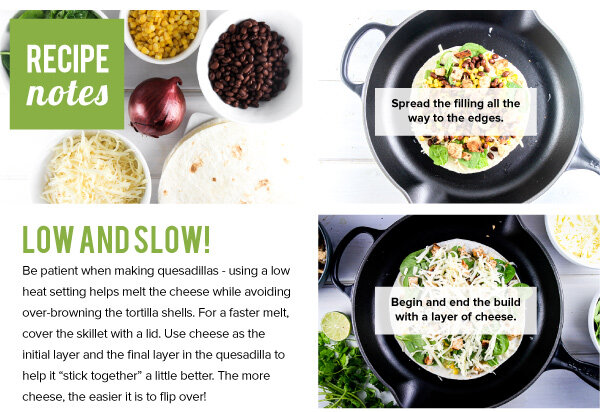
2. Use a panini press or a skillet on the stovetop to cook the quesadillas. 

3. Load a tortilla with a layer of pepper jack cheese, then add all of the quesadilla ingredients: diced chicken, black beans, corn, and spinach leaves. Finish with another layer of cheese, then top with another tortilla. 

4. If cooking on the stovetop use low heat and practice patience while the cheese melts! Using a large spatula, flip the quesadilla after the cheese has melted enough to hold it together. 

5. Cut the quesadilla into wedges and enjoy warm with an array of toppings.


Chicken Green Enchiladas
Makes 8 enchiladas 

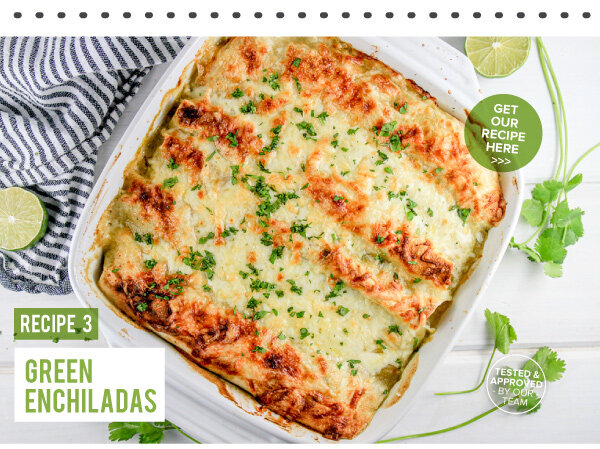
Cheesy and creamy, these green enchiladas are one great definition of comfort food! The green enchilada sauce is enhanced with a filling of grilled and diced chicken, white beans, green chilies, cheese, onion, garlic, herbs, and a little sour cream. After stuffing and rolling the enchiladas, add another layer of sauce on top. Don’t forget to finish with a hearty layer of cheese. After baking, garnish with fresh cilantro. So tasty!  

Enchiladas:
2 garlic & lime chicken breasts (marinated, grilled, and sliced)
2 tablespoons olive oil
1 onion, diced
2 cloves garlic, minced
1 teaspoon dried oregano
1 teaspoon dried cumin
1/2 teaspoon Kosher salt
1/2 teaspoon freshly ground pepper
1 can (4 oz) diced green chilies
1 can white beans, rinsed and drained
2 cups Monterey Jack cheese, shredded
1 can (28 oz) green enchilada sauce
1 cup sour cream 

Garnishes:
Lime wedges, Fresh cilantro leaves, Pickled jalapeños, Hot sauce 

Directions:
1. Preheat the oven to 400 degrees F. 

2. Sauté the onion and garlic in a large skillet until the onion is translucent. Season the onions with oregano, cumin, salt, and pepper. 

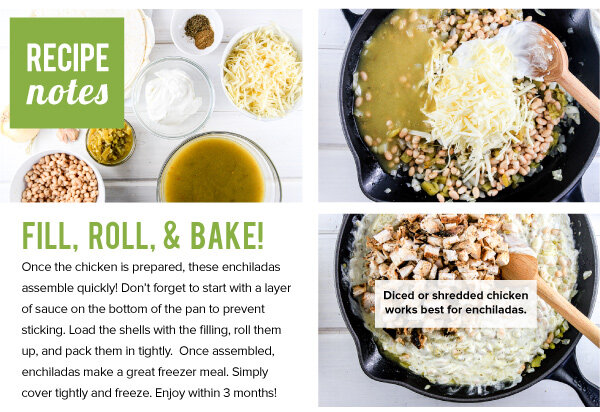
3. Add the green chilies, white beans, 1 cup of grated cheese, 1 cup green enchilada sauce, and 1 cup of sour cream. Stir to combine. Add the diced chicken and fold together until combined. 

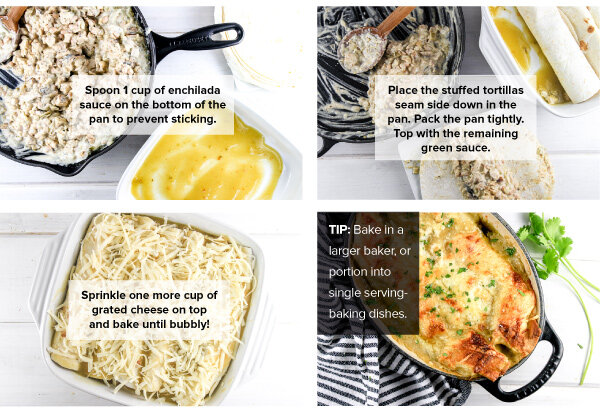
4. Spoon 1 cup of enchilada sauce around the bottom of the pan. This recipe makes about 8 enchiladas which can fit into a standard 9x12 casserole pan, or individual sized dishes that fit 2 enchiladas each. 

5. Fill the tortillas with a scoop of the chicken mixture and roll up tightly. Place the stuffed tortillas seam side down in the pan. Pack the pan tightly. 

6. Spoon more enchilada sauce on top of the rolled tortillas. Sprinkle one more cup of grated cheese on top. 

7. Bake for 20-25 minutes or until the cheese has started to brown and the enchiladas are bubbling hot. 

8. Serve warm with your choice of garnishes.


A Good Time to Have Brunch In!

Lia Soneson

 
Brunch2020_v3_01.jpg

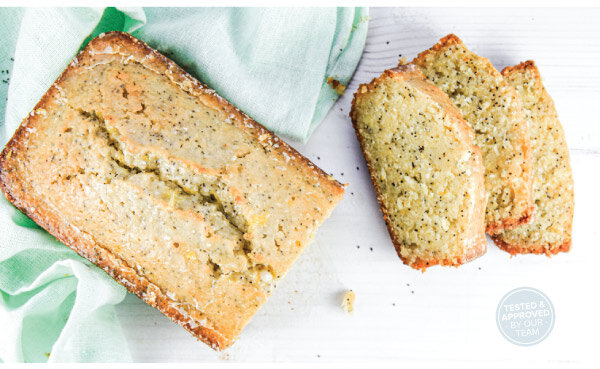
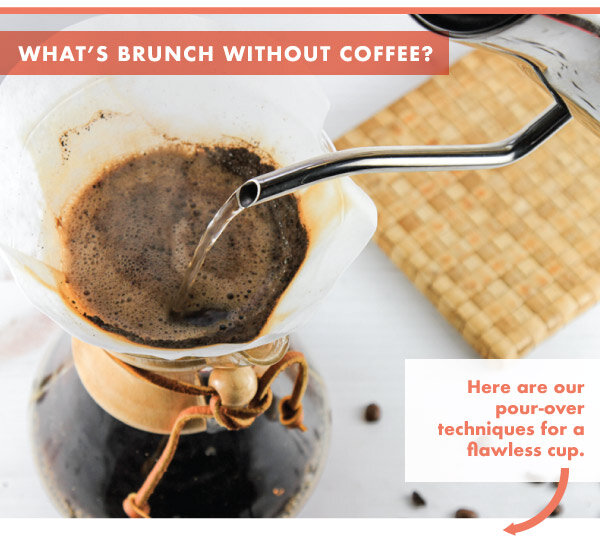
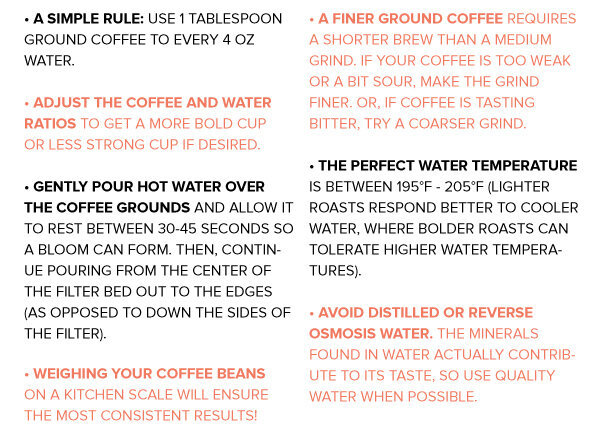
There is no better time than the present to brunch . . . IN! If breakfast is the most important meal of the day, brunch is the most fun! Brunch implies a leisurely sort of day — where our schedules are less relentless and time together is well spent. Whether you spend it with family or a few good friends, we've composed a foolproof menu worth celebrating.
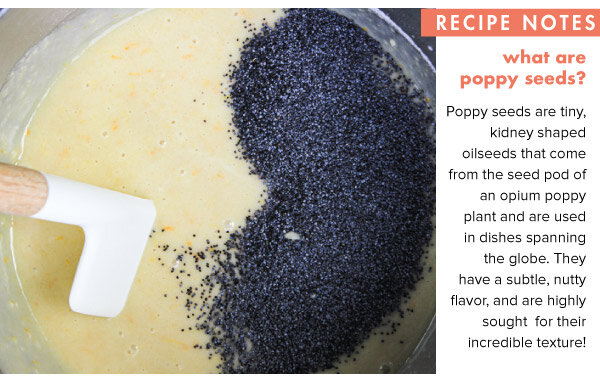
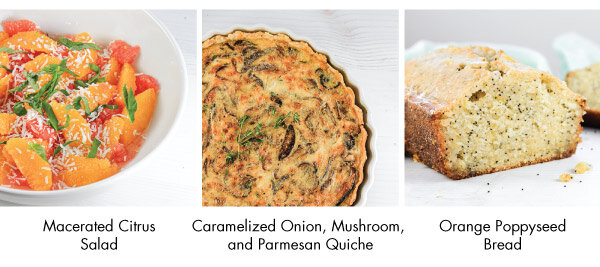
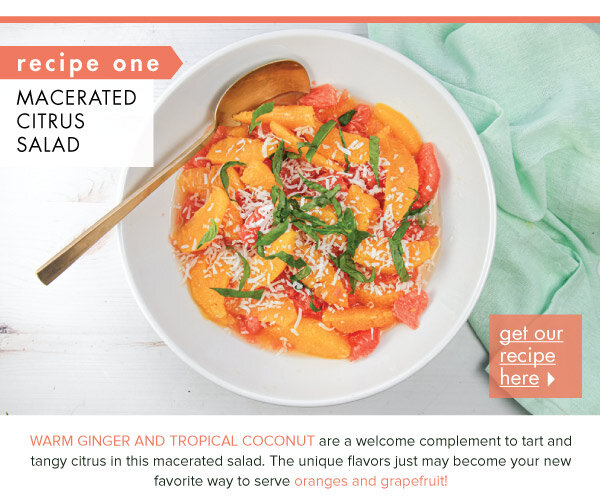
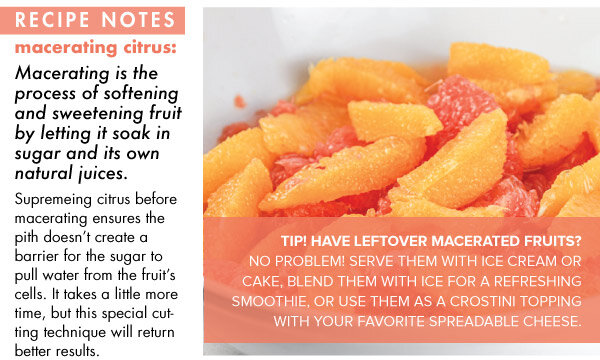
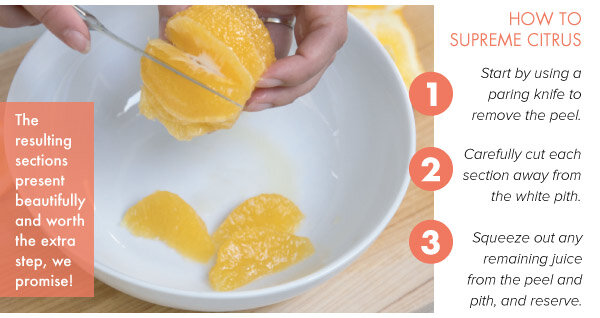
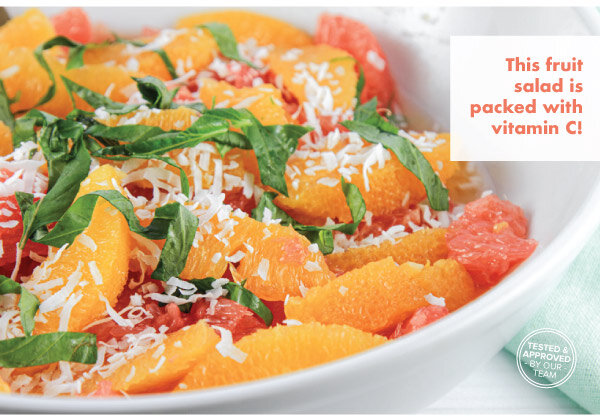
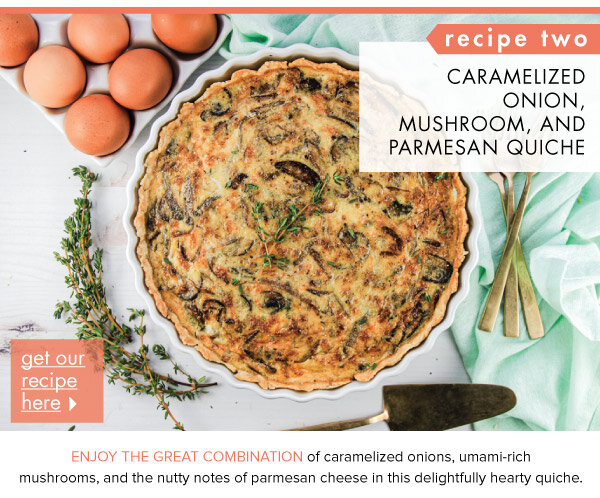
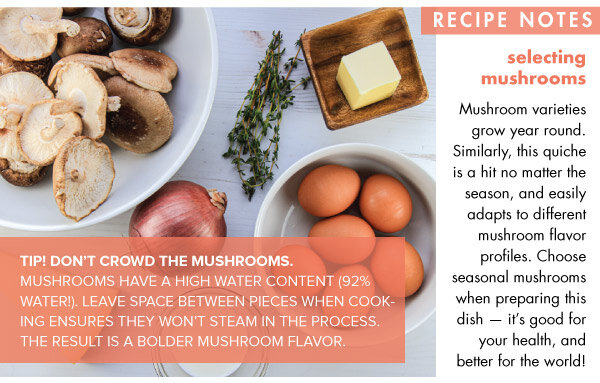
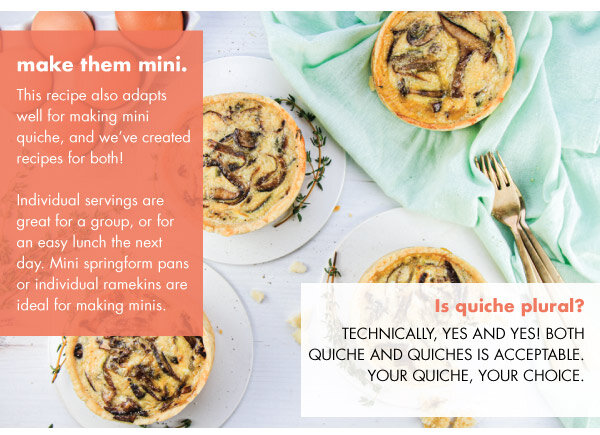
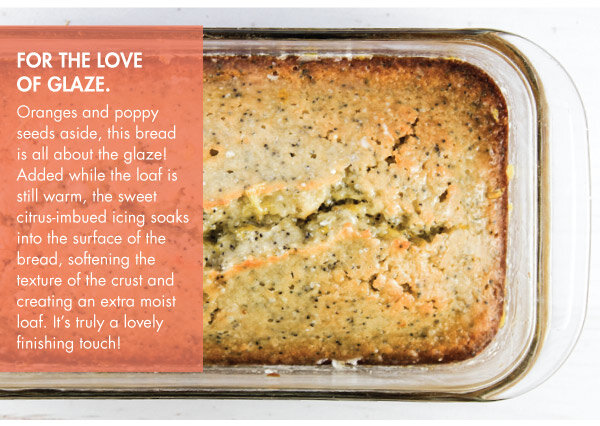
IN THIS ISSUE, we feature a Caramelized Onion, Mushroom, and Parmesan Quiche, Macerated Citrus Salad, and a side of Orange Poppyseed Bread.


Learn How to Make a Classic Pot Roast!

Lia Soneson

 
Pot_Roast_v1_01.jpg

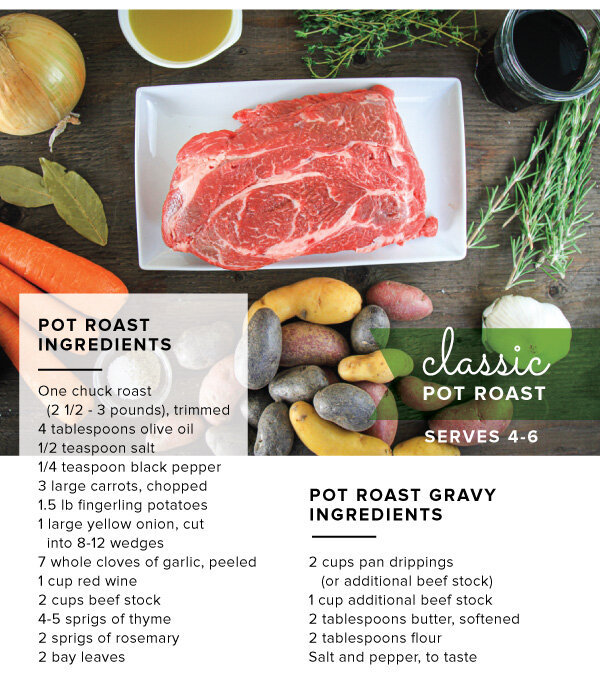
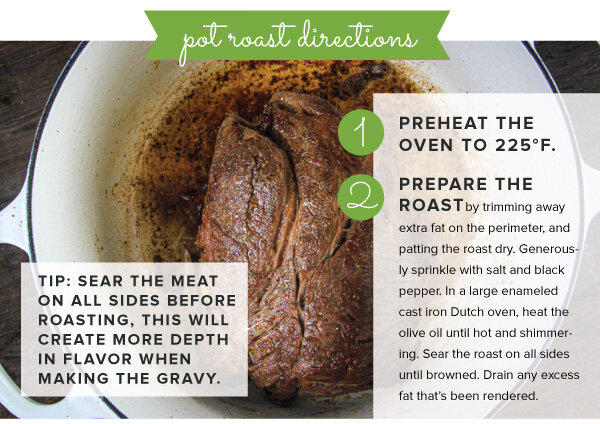
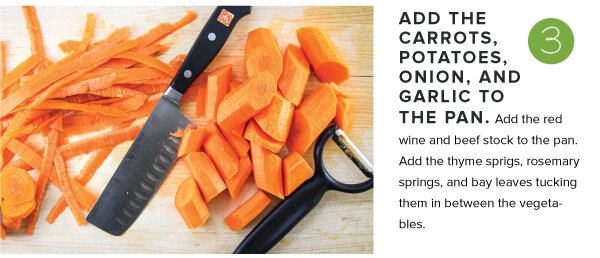
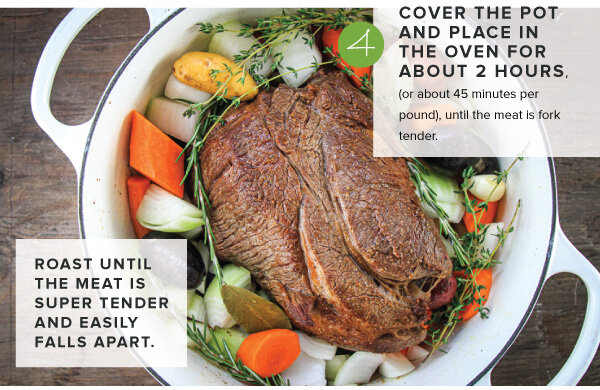
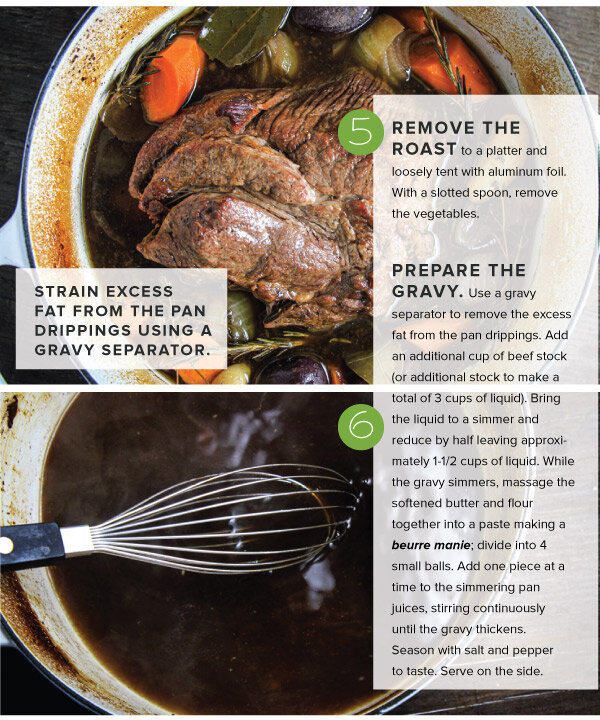
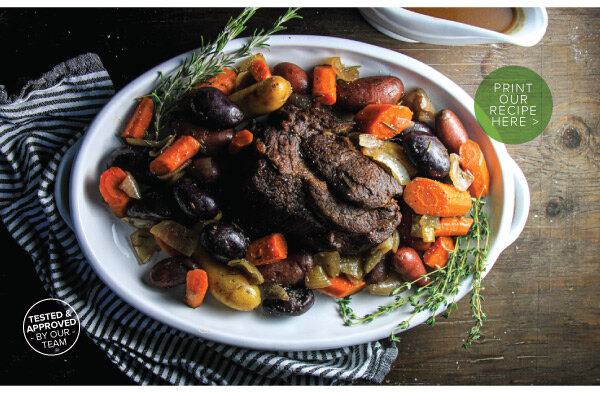
Nothing beats a classic pot roast! Easy to prepare, the oven does all the hard work of creating an entire delicious meal in one pot. We recommend using a large enameled cast iron Dutch oven or large braiser for roasting - it cooks food perfectly and clean up is so easy. A quick gravy ties all the savory flavors together for a meal that delivers on comfort and flavor.


Entree-Worthy Summer Salads

Lia Soneson

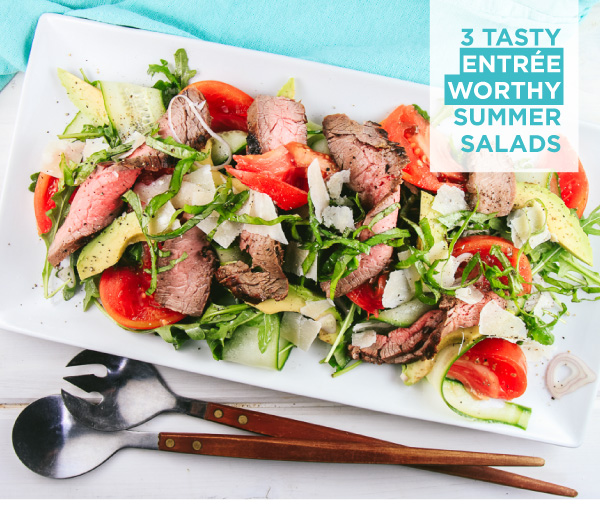
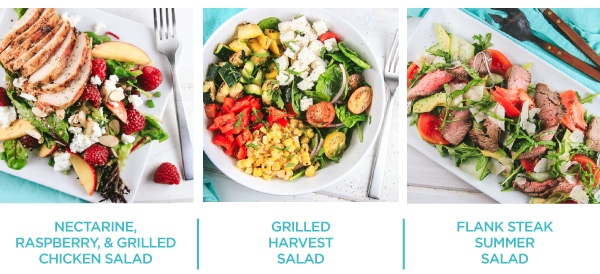
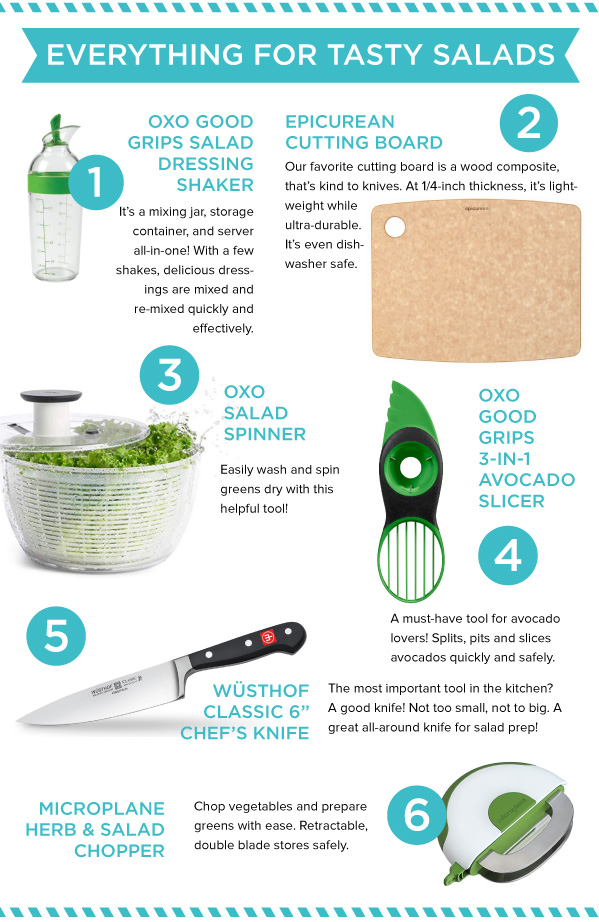
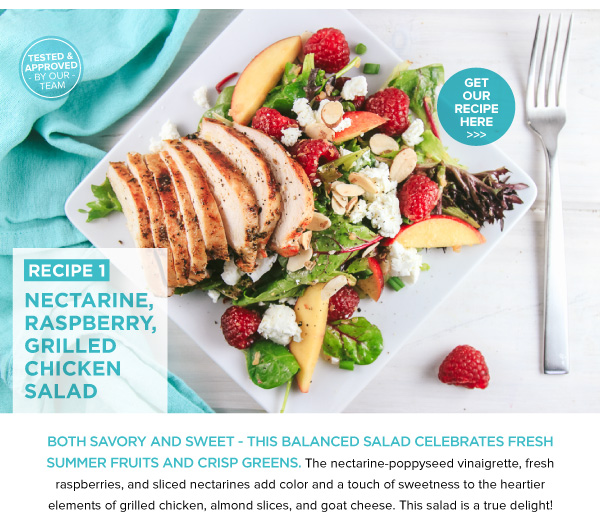
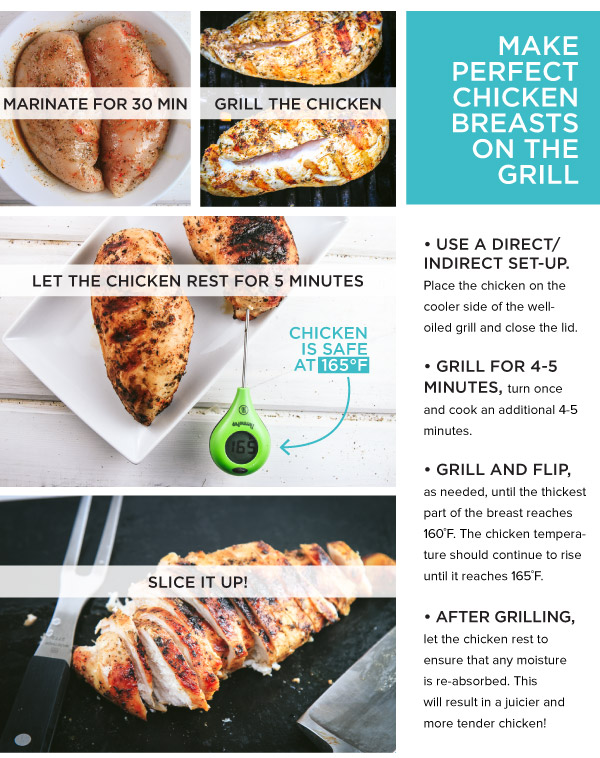
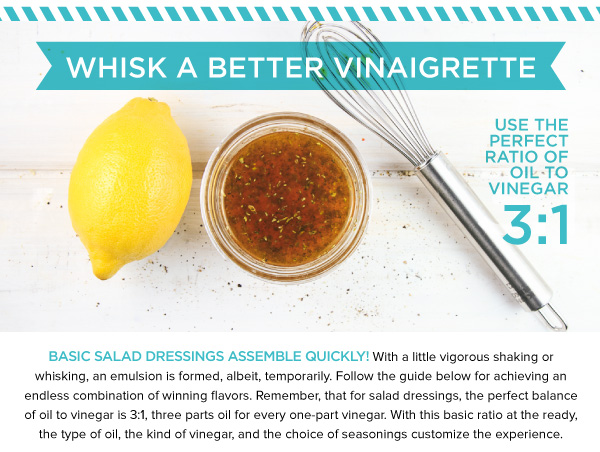
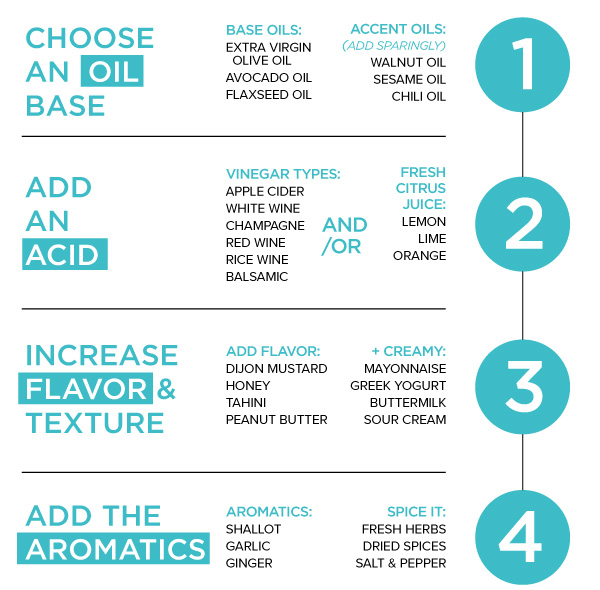
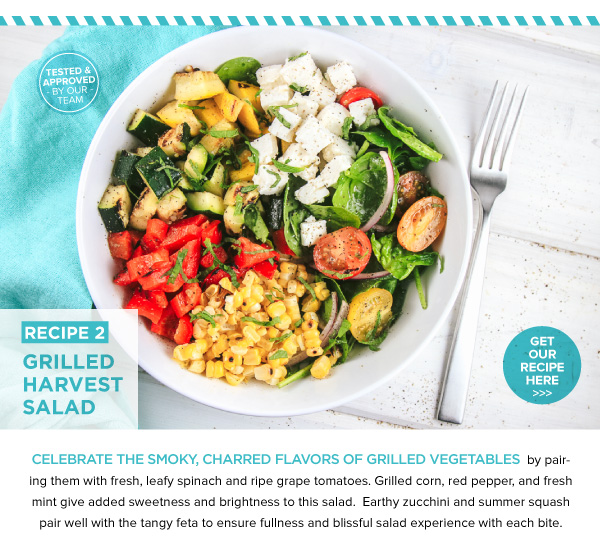
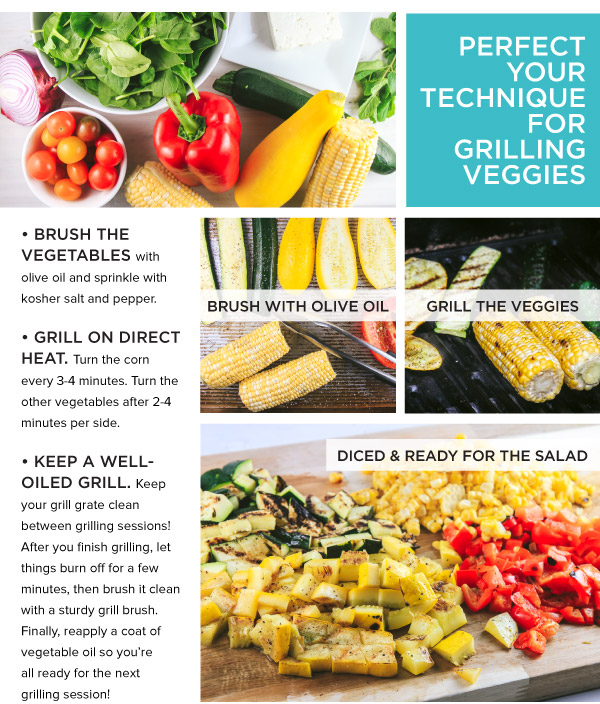
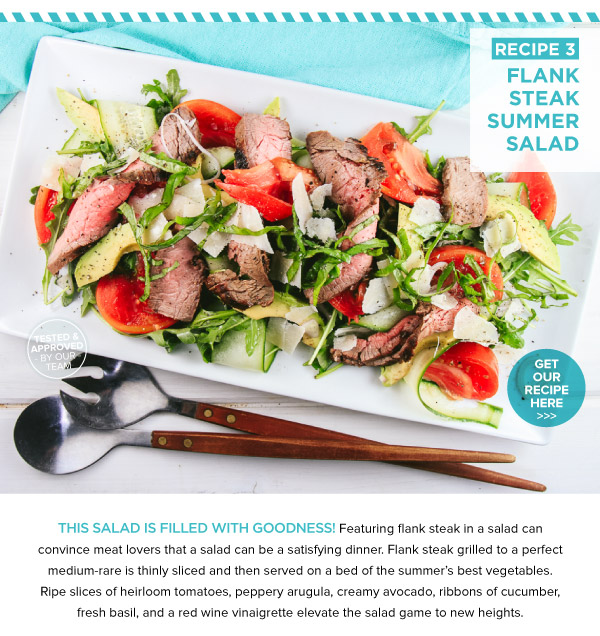
NEW June Classes! PLUS, 3 Entree-Worthy Summer Salads for You!
Summer Salads
Recipes
Cooking Classes
Facebook
Razzy Appke
Free Gift Wrapping
Featured Products
recipeone
Summer Salads
Summer Salads
Summer Salads
Summer Salads
recipetwo
Summer Salads
Summer Salads
recipethree
Summer Salads
Summer Salads
Summer Salads
Summer Salads