Contact Us

Use the form on the right to contact us.

You can edit the text in this area, and change where the contact form on the right submits to, by entering edit mode using the modes on the bottom right. 

2210 Haines Avenue
Rapid City, SD, 57701
United States

605-341-5044

Someone's In the Kitchen is an independent, gourmet kitchenware store in Rapid City, South Dakota. We are your shop for "all things kitchen". Enjoy a leisurely shopping experience in the world of kitchen and home.

RECIPE ARCHIVE IV

Filtering by Category: Lunch

Curried Egg Salad with Salted Peanuts and Raisins

Lia Soneson

Prepare lunch for the week ahead with a batch of curried egg salad! Boiled “just enough,” the creamy eggs are combined with salty peanuts, plump raisins, and a curried mayo mixture that makes lunchtime something to look forward to. Serve with your choice of bread or crackers, or spoon a heap on top of romaine for an easy, satisfying meal!


Curried Egg Salad with Salted Peanuts and Raisins
Serves 4

Ingredients:

8 eggs
1/3 cup mayonnaise
1/2 tablespoon rice vinegar
1 teaspoon curry powder
1/2 teaspoon turmeric
1/4 teaspoon Kosher salt
1/4 teaspoon black pepper
2 green onions, chopped
1/2 cup roasted and salted peanuts, roughly chopped
1/2 red onion, diced
1 celery rib, diced
1 tablespoon fresh mint, chopped
2 tablespoons raisins, chopped
Crackers or whole grain toast

Directions:

1. Prepare the hard boiled eggs: Add the eggs to a saucepan and fill the saucepan with cold water, covering the eggs with about 1-2 inches of water. Bring the water to a boil. Once boiling, immediately turn off the heat, cover the pan with a lid, and let set for 9 minutes. Remove immediately from the hot water and place in an ice bath for several minutes. Once cool enough to handle, peel and chop the eggs.

2. In a large bowl, the chopped eggs, mayonnaise, rice vinegar, curry powder, turmeric, salt, and pepper until the eggs are coated.

3. Fold in the green onions, peanuts, red onion, celery, mint, and raisins until evenly combined. Add additional salt and pepper if desired.

4. Serve with hearty, toasted bread or crackers.

Banh Mi Inspired Grilled Pork Bowls

Lia Soneson

This recipe, inspired by Banh Mi sandwiches, delivers vibrant and delicious flavors in a convenient bowl format. Enjoy the savory grilled pork, zesty pickled carrots, fresh herbs, and complementary rice. Every bite holds the promise of satisfying, bold flavors designed to delight.


Banh Mi Inspired Grilled Pork Bowls
Serves 4

Ingredients for the Grilled Pork:

About 1 pound pork tenderloin, sliced on a bias into 1/4-inchthick pieces
3 cloves garlic, minced
1 tablespoon shallot, minced
3 tablespoons soy sauce
1 tablespoon fish sauce (may omit, OR substitute vegan fish sauce)
1 tablespoon brown sugar
1 tablespoon fresh lime juice, (about 1/2 of a lime)
1 tablespoon sriracha sauce
1/4 teaspoon Kosher salt
1/4 teaspoon black pepper

Ingredients for the Pickled Carrots:

1 cup carrots, julienned, about 2-inches long
1/4 cup rice vinegar
1 tablespoon sugar
1/2 teaspoon salt

Ingredients for the Rice:

1-1/2 cups jasmine rice, well-rinsed
2-1/4 cups water
1 tablespoon butter
Pinch of salt

Ingredients for the Sriracha Mayo:

1/3 cup mayonnaise
1 tablespoon sriracha sauce
Juice 1/2 of a lime

Ingredients for Assembling:

Cooked rice
Marinated and grilled pork
Pickled carrots
Purple cabbage, thinly sliced with a handheld mandoline
1/2 English cucumber, diced into
1/4-inch cubes
1 jalapeño pepper, thinly sliced on the bias
1 avocado, sliced
Fresh cilantro leaves, washed
Sriracha mayo
Sesame seeds, for garnish

Directions:

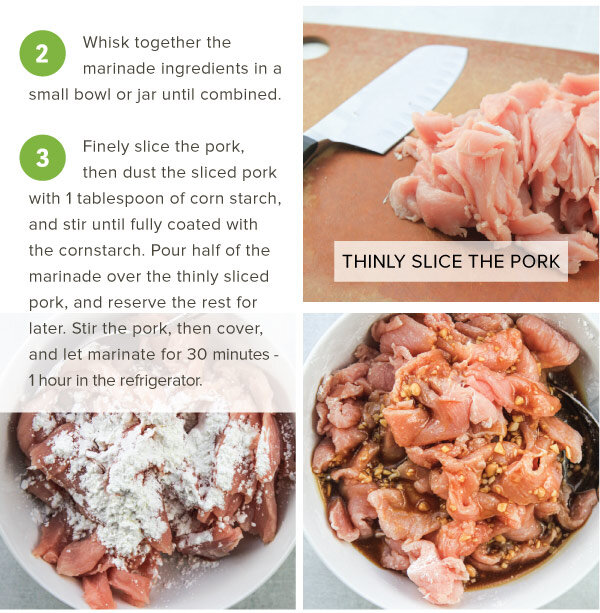
1. Slice the pork tenderloin into thin 1/4-inch pieces and place in a shallow bowl or sealable plastic bag.

2. Prep the marinade. In a medium bowl, whisk together the minced garlic, shallot, soy sauce, fish sauce (or vegan fish sauce), brown sugar, lime juice, sriracha sauce, salt, and black pepper.

3. Toss the sliced pork in the marinade until it's well-coated. Cover and refrigerate for at least 30 minutes, or up to 4 hours, to allow the flavors to infuse into the pork.

4. In a small bowl, prepare the pickled carrots. Combine the julienned carrots with the rice vinegar, sugar, and salt. Toss to coat the carrots and let them set for at least 15 minutes.

5. Use a handheld mandoline to thinly cut the cabbage. Cut the thin slices into about 2-inch long pieces. Prepare the cucumber by dicing. Thinly slice the jalapeño pepper on the bias. Halve and slice the avocado. Set all the prepped veggies aside until it’s timeto assemble the bowls.

6. Meanwhile, make the rice. Rinse the rice using a fine-mesh strainer. Agitate and rinse the rice until the water runs clear. Add the rinsed rice, cold water, butter, and salt to a medium sauce pan and bring to a boil. Once the water boils, cover with a tight-fitting lid and turn to low heat. Cook the rice for 15 minutes on low. Then, remove the pan from the heat and keep covered for another 15 minutes. Once ready to assemble the bowls, fluff the rice with a fork.

7. Mix the sriracha mayo. In a small bowl, mix together the mayonnaise, sriracha, and lime juice until combined. Add additional sriracha, as desired.

8. Once all of the bowl elements are prepped, it's time to grill! Preheat the grill or grill pan over medium-high heat. Grill the marinated pork for about 3-4 minutes per side, or until it reaches 145 degrees F. Set aside to rest for 5 minutes. Slice into strips for the bowls.

9. Assemble the bowls. Place a portion of cooked jasmine rice at the bottom of each bowl. Artfully add the grilled pork slices, pickled carrots, purple cabbage, diced cucumber, and avocado slices to the bowl.

10. Garnish with your choice of toppings including sliced jalapeños, cilantro, sriracha mayo, and a sprinkle of sesame seeds.

11. Enjoy!

Tomato and Roasted Pepper Bisque

Lia Soneson

This is a lovely soup to prepare when you want a heart-healthy meal with just a touch of indulgence. Chopped and roasted red peppers are our favorite quick method for achieving that sweet, roasted red pepper flavor without the hassle of peeling pepper skins. An immersion blender will quickly become your best friend when making this smooth and satisfying bisque. Plus, you’ll find that this soup gets even better a day or two later!


Tomato and Roasted Pepper Bisque
Serves 4 - 6

Bisque Ingredients:

4 red bell peppers, chopped
6 cloves garlic, peeled
4 tablespoons olive oil, divided
1/2 teaspoon Kosher salt
1/4 teaspoon freshly ground black pepper
1 onion, minced
1 carrot, diced
2 tablespoons unsalted butter
1 tablespoon tomato paste
4 cups vegetable broth
1 can (28 oz) whole tomatoes
2 bay leaves
2 springs fresh thyme
1/4 cup half n' half

Pesto Ingredients:

4 cups basil leaves, packed
1 teaspoon Kosher salt
1/4 cup pine nuts
2 cloves garlic
3/4 cup olive oil
1 cup freshly grated Parmesan

Directions:

1. Preheat the oven to 400 degrees F.

2. On a large rimmed baking sheet, spread out the chopped red peppers and garlic in a single layer. Drizzle with 2 tablespoons olive oil, sprinkle with salt and black pepper and roast until peppers are a bit charred, about 45 minutes. Stir halfway through. Remove from the oven and set aside.

3. Make the pesto by combining all the pesto ingredients in a food processor and blending until smooth. Add additional olive oil or a drizzle of water as needed to thin. Set aside.

4. Meanwhile, in a large soup pot, over medium heat, sauté the onion and carrot in the remaining olive oil and butter until translucent. Add the tomato paste and cook for an additional minute. Add the vegetable broth, tomatoes, bay leaves, and fresh thyme. Simmer for 20 minutes.

5. Use tongs to remove the bay leaves. Add the roasted red pepper and garlic pieces, and remove the pot from the heat. Carefully blend the hot soup using an immersion blender until the texture is smooth.

6. Return the pureed soup to the heat, and stir in the half n' half. Drizzle the top with pesto, and sprinkle with additional salt and pepper to taste. Serve hot with crusty bread and butter.

Chickpea Soup with Lemon and Potatoes

Lia Soneson

This hearty soup combines earthy potatoes and creamy chickpeas for a deliciously flavorful dish. Brightened by citrus and enhanced with fresh parsley and Parmesan, the soup is thickened with a partial puree of itself. Pair it with slices of crusty bread with butter for an easy weeknight meal.


Chickpea Soup with Lemon and Potatoes
Serves 6 - 8

Soup Ingredients:

2 tablespoons unsalted butter
2 tablespoons olive oil
2 stalks celery, leafy tops removed, scrubbed, and finely chopped
1 small yellow onion, finely chopped
2 small carrots, scrubbed, peeled and finely chopped
3 cloves garlic, minced
1/4 teaspoon black pepper, plus more to taste
1/2 teaspoon Kosher salt, plus more to taste
1/2 teaspoon turmeric
1/4 teaspoon crushed red pepper flakes
6 cups vegetable stock
2 bay leaves
2 (15 oz) cans chickpeas, drained and rinsed
1.5 lbs small yellow potatoes, scrubbed and cut roughly into 1/2" pieces
1 lemon, zested and juiced Garnishes:
1/4 cup grated Parmesan
1/4 cup fresh parsley lemon slices

Directions:

1. In a large Dutch oven, heat the olive oil and butter over medium heat.

2. Make a mirepoix by sautéing the celery, onion, and carrot in the warm olive oil and butter until the carrot and celery are soft and the onions are translucent, roughly 5 minutes. Stir in the garlic, pepper, salt, turmeric, and crushed red pepper flake, and continue to sauté for another minute until the ingredients are incorporated and smelling fragrant.

3. Add the vegetable stock, bay leaves, chickpeas, and potatoes and bring ingredients to a boil. Once boiling, reduce the heat to low and simmer for 15-20 minutes, or until the potatoes are fork tender.

4. Use tongs to remove the bay leaves and discard. Very carefully ladle roughly half of the soup into a blender and purée until smooth. Return the pureed soup back into the Dutch oven and stir to create a creamy base, still with whole chickpeas and potato pieces throughout.

5. Stir in the lemon zest and one tablespoon lemon juice. Taste and add more lemon juice to your desired preference. Serve topped with a heaping pile of Parmesan and parsley, and a lemon slice, if desired. Add additional salt and pepper to taste.

Burgers with a Bacon and Onion Whiskey Sauce

Lia Soneson

Time to fire up the grill! Take your burger game from ordinary to incredible this season with some fresh inspiration. Our burgers are loaded with some of our favorite toppings -- crispy bacon, sharp cheddar cheese, arugula, and onions that are bathed in a decadent whiskey sauce. The result? Over the top delicious!


Burgers with a Bacon and Onion Whiskey Sauce
Makes 4 burgers

Burger Ingredients:

1-1/2 lb ground beef (80/20)
1 teaspoon Kosher salt
1/2 teaspoon pepper

Bacon and Onion Whiskey Sauce:

4 slices bacon, cooked and cut in half, reserve 1-2 tablespoons of bacon grease
1 sweet onion, sliced pole-to-pole
1/3 cup brown sugar
1/2 teaspoon Kosher salt
1/2 teaspoon pepper
1 teaspoon Worcestershire sauce
1 ounce whiskey

Burger Fixings:

4 slices sharp white cheddar cheese
4 hamburger buns, grilled
arugula
mayonnaise, if desired

Directions:

1. In a large bowl, mix the ground beef with the salt, and pepper. Divide the mixture into four equal portions, and then shape into 4 burger patties -- each about 4 inches in diameter.

BURGER TIPS: Wet your hands with water or a little olive oil before forming burgers for easier hand washing after! Use parchment paper between the formed burgers for easier placement on the grill.

2. Prepare the bacon and onion whiskey sauce. In a skillet, cook the bacon until crispy, then remove the bacon and let drain on a paper towel-lined plate. Reserve between 1-2 tablespoons of bacon grease in the skillet for cooking the onions. Carefully discard any excess bacon grease. Slice the onions pole-to-pole, then cook the onions in the reserved bacon grease until they begin to brown and caramelize. Sprinkle the cooked onions with the brown sugar, salt, pepper, and Worcestershire sauce. Cook until the sugar is dissolved. Add the whiskey, and let the mixture bubble and cook for a few more minutes. Set the saucy onions aside until ready to assemble the burgers.

3. Grill the burgers on a medium-hot, well-oiled grill, or on a cast iron griddle for about 4 minutes per side until the internal temperature reaches 160 degrees F.

4. Once the burger has cooked, add a slice of sharp white cheddar cheese to each burger, and let melt. Place the cooked burgers on a clean plate and let rest them for five minutes.

5. While the burgers are resting, grill the buns until lightly toasted.

6. Assemble the burgers. Place a handful of arugula on the bottom bun. Add the grilled beef patty (with the melted cheese). Layer on a few slices of bacon, then spoon on the onion whiskey sauce. Top with the other bun half (slathered with mayonnaise if desired). Serve while hot

Temaki Sushi Hand Rolls

Lia Soneson

Also referred to as a "hand roll" because of it's perfectly hand-sized cone size and shape, temaki sushi is not only delicious, but offers customization and versatility in its ingredients, depending on your location, the season, and personal preference. This recipe is for maguro (tuna), but the sky is the limit when it comes to making these beautiful hand rolls.


Temaki Sushi Hand Rolls
Makes 8 pieces

Sushi Rice Ingredients:

2 cups short grain white sushi rice
2 cups water
2 tablespoons rice vinegar
1 tablespoon white sugar
1 teaspoon salt

Temaki Roll Ingredients:

4 sheets of nori (dried seaweed)
8 oz sashimi grade raw tuna
2 Japanese or Persian cucumbers
1 small avocado
2 green onions
1/2 tablespoon wasabi paste
1 tablespoon toasted sesame seeds
4 tablespoons sashimi grade ikura (salmon roe)

Serve With:

soy sauce

Directions:

1. Prepare the rice. Rinse the rice in a colander until the milky water runs clear. This releases any excess starch, and helps to keep the rice from becoming gummy.

2. Combine the rice and water in a small, lidded pot and stir to incorporate. Cover and cook over medium-high heat until the water begins to boil. Reduce the heat to low, keep covered, and cook until the rice is tender and the water has been absorbed -- about 18-20 minutes. If using a rice cooker, turn the rice cooker on, add the rice and water, stir to incorporate. Press the rice down with your hand until the water just covers your hand. Remove your hand and close the lid. Select the 'white rice' function. After cooking, let the rice sit for 5 minutes to absorb any remaining moisture.

3. Meanwhile, in a small, microwave-safe dish, combine the rice vinegar, sugar, and salt and microwave for 30 seconds, stirring to ensure the sugar and salt have completely dissolved. Remove the rice from the rice cooker, or stovetop, and place in a large bowl. Pour the vinegar mixture over the rice and use a flat paddle to gently fold the mixture to integrate the flavors. Cover the bowl with a towel and set aside.

4. Cut the nori sheets in half.

5. Prepare the temaki roll ingredients. With a clean, sharp knife, cut the raw tuna into strips. Cut each cucumber into 4 equal sticks removing the seeded center. Halve the avocados, remove the pits, and slice the avocado into strips. Chop the green onions.

6. Assemble the temakisushi by laying a halved nori sheet horizontally, with the rough side up (this helps grip the rice). With the back of a spoon, carefully spread a thin layer of sushi rice on the left half of the nori sheet, leaving a 1/2" border.

7. Diagonally spread a thin layer of wasabi on the rice. Sprinkle with the toasted sesame seeds.

8. Place one strip of the tuna, cucumber, and avocado, diagonally on the rice. Sprinkle with green onion and salmon roe.

9. From the bottom left corner, diagonally fold up the nori to the top center of the nori sheet.

10. Roll the right side of the nori sheet around the cone, using a dab of water to help secure the sheet to itself, and then place seam side down to serve. (This same method may be used for other variations. Swap fillings for salmon, yellowtail, uni, scallop -- really, whatever your heart desires.

11. Serve temaki sushi with soy sauce. Enjoy!

Creamy Tomato Soup with Sausage and Tortellini

Lia Soneson

This hearty and veggie-packed soup is sure to satisfy. Loaded with vegetables, this soup becomes even more delicious with the addition of spicy sausage and cheese tortellini. We love how easy it is to make. It will definitely be part of our winter menu rotation!


Creamy Tomato Soup with Sausage and Tortellini
Serves 4-6

Ingredients:

1 pound spicy Italian sausage, formed into 1/2-inch sized chunks
2 tablespoons butter
2 tablespoons olive oil
1 medium onion, diced
3 stalks celery, (about one cup) diced
3 carrots, (about one cup) sliced
1 red pepper, diced
2 cloves garlic, minced
1/2 cup white wine
1 teaspoon dried oregano
1 teaspoon dried basil
1-1/2 teaspoons Kosher salt
1/2 teaspoon freshly ground pepper
4 cups chicken broth
1 can (28oz) fire-roasted crushed tomatoes
8-10 ounces pre-made cheese tortellini
1/2 cup heavy cream1 bunch kale leaves (or about 5 ounces), leaves stripped and chopped into bite-sized pieces
1/4 cup fresh basil, julienned, optional for garnish
Shaved Parmesan cheese, for garnish

Directions:

1. In a large, heavy-bottomed soup pot, or Dutch oven, brown the sausage. Cook the 1/2-inch, bite-sized chunks of sausage until thoroughly cooked and browned on all sides. If the sausage starts smoking or burning in the pot, add a little water as you cook the sausage. Stir the sausage often while it cooks. Once the sausage is cooked, remove and drain any excess grease by placing on a paper towel-lined plate. Set aside as the rest of the soup is assembled.

2. In the same soup pot, add the butter and olive oil. Sauté the onion, celery, carrots, and red pepper until the onions are translucent and softened. Add the garlic, and cook for an additional two minutes.

3. Add the white wine, cook and reduce until all of the wine is evaporated.

4. Add the oregano, basil, Kosher salt, and pepper. Then, add the chicken broth and the crushed tomatoes. Bring to a simmer. Simmer for 5-10 minutes to allow the flavors to blend. Tip: If you have saved an old Parmesan cheese rind this is a great time to add it to this soup. The simmering rind will add a deep umami taste to the final flavor of the soup.

5. After the soup simmers, remove the Parmesan cheese rind. Carefully use an immersion hand blender to puree some of the soup directly in the pot. Tip: Puree this soup as much as you'd like. We prefer to have some veggie chunks at the end, and use a light touch while pureeing. If you prefer it smoother, puree longer.

6. Return the soup pot to the stove and add the cheese tortellini. Cook until the tortellini are just done and start floating to the top. Stir in the heavy cream.

7. Stir in the chopped kale and add the cooked sausage back into the pot. The kale will quickly wilt and mingle into the soup.

8. Serve warm with a garnish of basil and shaved Parmesan cheese on top.

Brown Rice Bowls with Soy Chorizo, Roasted Sweet Potatoes, Black Beans, Corn, Green Onion, and Avocado

Lia Soneson

We love starting the new year off with a protein-packed bowl full of nutritious fuel. This dish features a spicy chorizo made with soy, and is loaded with flavorful cilantro-lime brown rice, black beans, corn, roasted sweet potatoes, and avocados. YUM!


Brown Rice Bowls with Soy Chorizo, Roasted Sweet Potatoes, Black Beans, Corn, Green Onion, and Avocado
Makes 4 - 6 bowls

Ingredients:

12 oz chorizo made from soy
1 cup brown rice
2 cups vegetable stock
2 tablespoons olive oil Juice and zest of one lime, about 1/4 cup lime juice
2 tablespoons cilantro, chopped
2 medium (about 2 pounds) sweet potatoes, diced into 1/2-inch cubes
3 tablespoons olive oil1/
2 teaspoon cumin
1/2 teaspoon garlic powder
1/4 teaspoon paprika
1/4 teaspoon chili powder
1/4 teaspoon cayenne
1 teaspoon Kosher salt
1/4 teaspoon freshly ground pepper
1 can (15 oz) black beans, drained and rinsed
1 cup frozen corn, thawed
2 avocados, sliced
6 green onions, sliced

Garnishes:

Cilantro leaves
Sour cream, optional
Hot sauce, optional

Directions:

1. Preheat the oven to 450 degrees F.

2. Make the brown rice in a saucepan with a lid. Rinse the brown rice before cooking. Using a 2:1 liquid-to-grain ratio, cook the brown rice in vegetable stock (or lightly salted water) until tender, about 35-45 minutes. Once the rice is tender, fluff with a fork and mix with the lime juice, lime zest, and chopped cilantro.

3. Roast the sweet potatoes. Peel and dice the sweet potatoes into 1/2-inch cubes. Toss with 3 tablespoons of olive oil, the cumin, garlic powder, paprika, chili powder, and cayenne until coated. Roast for about 20-25 minutes, stirring halfway through. Roast until fork tender. Set aside until ready to assemble the bowls.

4. Cook the soy chorizo in a large skillet. Finely crumble when cooking until well-browned, then set aside until ready to assemble the bowls.

5. Drain and rinse the beans, and thaw the corn in the microwave in a small bowl. or in a skillet.

6. Slice the avocado, green onion, and chop more cilantro for garnish.

7. Load the bowls with all of the prepped ingredients and enjoy! Serve with a dollop of sour cream and a drizzle of hot sauce, if desired.

Grilled Nectarine and Chicken Salad

Lia Soneson

 
GrilledSalad_v3_01.jpg

Try this truly satisfying summer salad! Grilled chicken and nectarine halves perfectly complement the crispy crunch of fresh greens. Creamy goat cheese, bright blueberries, and a homemade, herbed buttermilk dressing seal the deal for this wonderful meal!


Grilled Nectarine and Chicken Salad with an Herbed Buttermilk Dressing
Serves 4

Salad Ingredients:
2 large chicken breasts, about 1 lb boneless, thinly sliced (or 4 thinly-cut chicken breasts)
4 nectarines, halved and grilled
6 oz spring mix of spinach and arugula
4 oz goat cheese, crumbled into bite-sized pieces
1 cup blueberries, washed
1/4 small red onion, thinly sliced

Chicken Marinade:
1 teaspoon Kosher salt
1/2 teaspoon black pepper
1/2 teaspoon garlic powder
1/2 teaspoon dried basil
1/2 teaspoon dried oregano
1/4 teaspoon paprika
2 tablespoons olive oil
2 tablespoons fresh lemon juice

Herbed Buttermilk Dressing:
1 clove garlic, grated
1 tablespoon fresh parsley, minced
1 tablespoon fresh basil, minced (8-10 leaves)
1 tablespoon chives, sliced
1/2 cup buttermilk
1/2 cup Greek yogurt
2 tablespoons olive oil
2 tablespoons lemon juice
1 tablespoon white wine vinegar
1 teaspoon Kosher salt
1/2 teaspoon black pepper
1/4 teaspoon garlic powder
1 teaspoon sugar

Directions:
1. Prepare the chicken breasts by thinly slicing in half to make thinner breasts for more flavor and faster grilling. Marinate the chicken in a large bowl. Rub the chicken on all sides with Kosher salt, pepper, garlic powder, basil, oregano, and paprika. Drizzle with olive oil and lemon juice. Cover and refrigerate the chicken; marinate for 30 minutes or up to 1 hour.

2. Prepare the herbed buttermilk dressing. Peel and grate the garlic using a fine grater. Wash the parsley, basil, and chives and chop finely. In a medium-sized glass bowl, whisk the buttermilk and Greek yogurt together until well combined. Add the olive oil, lemon juice, Kosher salt, pepper, garlic powder, and sugar; mix well. Whisk in the grated garlic and chopped herbs until evenly incorporated.

3. Prepare the nectarines for grilling by washing, and slicing in half. Carefully remove the pit with a paring knife. Brush each half with olive oil.

4. Fire up the grill! When using a gas grill, prepare half of the grill with high heat while keeping the other half on low heat -- that is, use a direct/indirect set-up. Add the chicken to the cooler side of the well-oiled grill and close the lid. After 4-5 minutes, turn once and cook an additional 4-5 minutes. Continue to grill and flip, as needed, until the thickest part of the breast reaches 160°F. After removing the chicken from the grill, the heat in the chicken breast will continue to rise until it hits the food-safe temperature of 165°F. Let the chicken rest for 5 minutes, then cut into slices.

5. Grill the nectarine halves flesh-side down over medium-high heat for 3 to 4 minutes or until grill marks appear.

6. Assemble the salad! Layer the greens and red onion with a drizzle of the herbed buttermilk dressing. Top the salad with the grilled chicken slices, grilled nectarine halves, goat cheese crumbles, and blueberries. Garnish with fresh chives, if desired.


Fresh Tomato Tart

Lia Soneson

 
Tomato_Tart_v6_01.jpg

Peak tomato season is upon us! A tomato tart is a unique and delicious way to showcase this summertime star. This dish features a Parmesan cheese crust layered with whipped ricotta and finished with slices of heirloom tomatoes and fresh basil. Enjoy this tomato tart with a simple side salad for a delightful lunch or dinner!


Fresh Tomato Tart
Makes one 9-inch square tart

Parmesan Crust Ingredients:
1-1/4 cups flour
1/2 teaspoon Kosher salt
1/4 teaspoon freshly ground pepper
1 cup Parmesan cheese, grated
1/2 cup cold, salted butter, cut into cubes
1-3 tablespoons ice water

Whipped Ricotta Filling Ingredients:
8 oz fresh ricotta cheese
1 tablespoon olive oil
1 teaspoon fresh lemon juice
1 teaspoon lemon zest
1/4 teaspoon Kosher salt

Topping Ingredients:
3 large heirloom tomatoes, sliced
Salt for tomatoes
Basil, chiffonade cut for garnish
Lemon zest, for garnish
Reduced balsamic vinegar, drizzled for garnish
Kosher or flake salt for garnish

Directions:

1. Prepare the crust. Using a food processor, pulse the flour, salt, pepper, and Parmesan cheese together until combined. Add 1/2 of the cubed butter and pulse until the texture is as coarse as cornmeal. Add the remain- ing butter and pulse a few times leaving some pieces the size of small peas. Slowly drizzle the water in one tablespoon at a time, and pulse until the dough forms. Avoid adding too much water.

2. Pat the dough into a disc form and wrap with plastic wrap. Refrigerate for at least one hour.

3. Meanwhile, prepare the whipped ricotta filling. In a food processor or high-powered blender, whip the ricotta with the olive oil, fresh lemon juice, lemon zest, and salt until a very smooth texture is formed.

4. Prepare the topping ingredients. Slice the tomatoes into 1/4”-thick slices, and place on a paper towel-lined sheet pan. Sprinkle the slices with Kosher salt and let them rest for a few minutes to release excess juices. Slice the basil into a chiffonade cut for a garnish. Zest a lemon to use as a garnish, as well.

5. Preheat the oven to 375°F. Roll out the crust on a flour-dusted work surface. Place the crust in a greased tart pan and trim the edges. Place pie weights inside the tart crust and bake for 15-20 minutes. Remove the pie weights and continue baking an additional 15-20 minutes or until the crust springs back when touched, and has turned a light golden hue. Allow the crust to cool completely on a cooling rack.

6. Assemble the tart once the crust has cooled completely. Spread the whipped ricotta on the baked crust. Top the ricotta layer with the tomato slices. Garnish with the basil, lemon zest, a pinch of salt, and a drizzle of reduced balsamic vinegar. Serve immediately. Enjoy with a simple side salad, if desired.


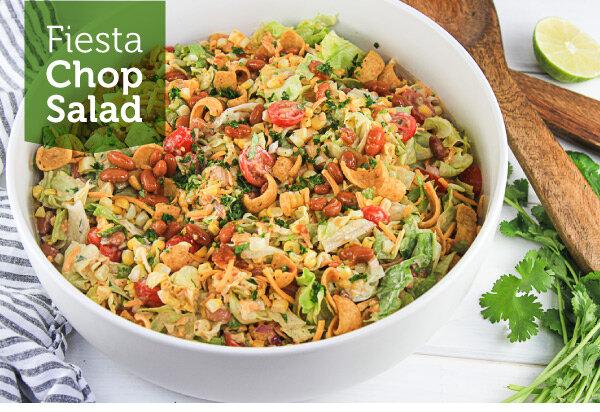
Fiesta Chop Salad

Lia Soneson

 
FiestaChop2021_v3_01.jpg

This Fiesta Chop Salad is packed with goodies! Start with the fresh crunch of chilly iceberg lettuce, then add cheese, chili beans, red onions, tomatoes, grilled corn, AND corn chips! The creamy, tangy cilantro dressing ties it all together. Enjoy all the fresh, delicious flavors – your taste buds will be doing a happy dance!

Fiesta Chop Salad
Serves 6 - 8

Creamy Cilantro Dressing:
(makes about 1 cup of dressing)
1/4 cup white wine vinegar
1 tablespoon fresh lime juice
1/4 cup olive oil
1/2 cup plain Greek yogurt
2 teaspoons sugar
1/2 teaspoon dried cumin
1/2 teaspoon garlic powder
1/2 teaspoon dried oregano
1/4 teaspoon paprika
1/4 teaspoon Kosher salt
1/4 teaspoon black pepper
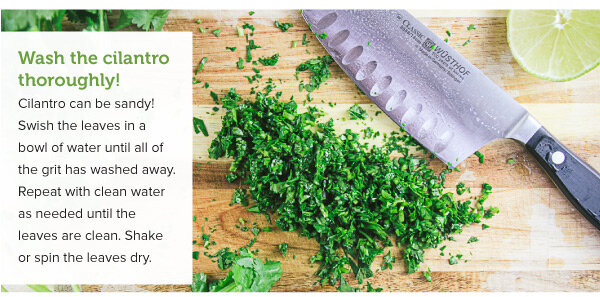
2 tablespoons fresh cilantro, minced

Salad Ingredients:
1 head chopped iceberg lettuce
10 oz grape tomatoes, halved
1 can (14 oz) chili beans, slightly drained
4 ears corn, grilled and kernels cut off the cob
Olive oil for brushing corn cobs
1/4 red onion, finely diced
3 cups grated sharp cheddar cheese
2 cups corn chips (like Fritos)

Directions:
1. Make the dressing. Prepare the cilantro by finely mincing for the dressing. Whisk together the vinegar, lime juice, olive oil, Greek yogurt and sugar together in a small jar until well combined. Add the spices and cilantro, and whisk or shake until emulsified.

2. Prep the veggies. Over direct heat, grill the corn (turning as needed) until char marks appear. About 15-20 minutes. Once the grilled corn has cooled slightly, carefully cut the kernels off from the cob with a sharp knife, or a corn stripping tool.

3. Meanwhile, wash and chop the lettuce. Finely dice the red onion and halve the grape tomatoes.

4. Assemble the salad. Toss all of the salad ingredients together with the dressing and then top the salad with the corn chips. Toss once more to incorporate the chips. Serve immediately!


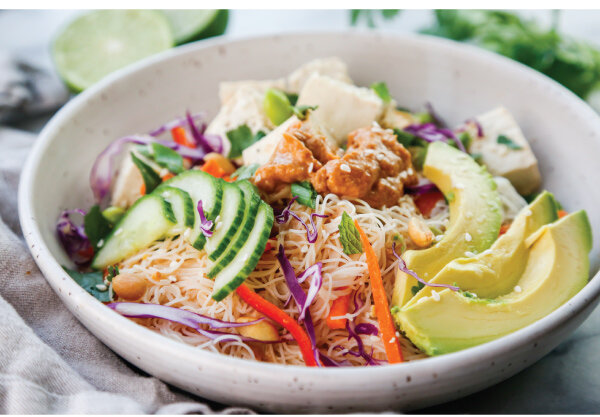
Spring Roll Bowls

Lia Soneson

Spring_Roll_Bowls_V2_01.jpg

Craving fresh and flavorful? Crunchy, salty, sweet, colorful, and delicious -- our Spring Roll Bowls can satisfy them all! Great for lunch or dinner, this veggie-packed bowl delivers a healthy punch of flavor and goodness in an easy to assemble bowl. A rainbow of ingredients pair with marinated tofu and vermicelli noodles. It’s all topped with a bold and spicy peanut sauce that will tickle your taste buds!

Spring Roll Bowl with Spicy Peanut Sauce
Makes 4 servings

Tofu and Marinade Ingredients:
14 oz block firm or extra firm tofu
2 teaspoons soy sauce
1-1/2 tablespoons rice vinegar
2 teaspoons sesame oil
1/4 teaspoon black pepper
1/2 tablespoon sesame seeds

Bowl Filling Ingredients:
2 large carrots, or 4 small carrots peeled
1 red pepper
1 English cucumber
4 green onions, sliced
1 avocado, sliced
1/4 head red cabbage, sliced with a mandoline
1 cup edamame
8.8 oz vermicelli noodles (1 standard package)

Spicy Peanut Sauce Ingredients:
1 cup peanut butter
2 tablespoons chili garlic sauce
2 tablespoons soy sauce
2 tablespoons rice wine vinegar
2 teaspoons sesame oil
3 tablespoons fresh lime juice
2 cloves garlic, minced
2 teaspoons ginger, grated
1 tablespoon brown sugar
2 tablespoons water, for thinning

Garnishes:
1/4 cup mint leaves
1/2 cup unsalted peanuts
Fresh cilantro leaves
Lime wedges

Directions:
1. Prepare the tofu. Drain the tofu and cut it in half down the length of the tofu block. Press the tofu between two paper towel-lined plates and use a large book or a heavy cutting board to gently press out any excess moisture. Let the tofu continue to press while preparing the other ingredients.

2. Prep the veggies. Cut the carrots and red pepper into matchsticks. Slice the cucumber, green onion, and avocado. Use a mandoline to finely shred the cabbage. Measure out the edamame.

3. Make the peanut sauce. Combine all of the peanut sauce ingredients together, except for the water, in a small bowl or measuring glass, and whisk to incorporate. Slowly whisk in the water one teaspoon at a time to thin the sauce until it is just able to be poured.

4. Place the vermicelli noodles in a bowl with very hot water, stir to separate. Cover for 15 minutes until noodles are softened and tender. Drain the noodles and run them under cool water. Set aside.

5. Cut the pressed tofu into 1/2" cubes. In a medium bowl whisk all of the the tofu marinade ingredients together, except for the sesame seeds, and then combine with the tofu. Gently and slowly toss the tofu in the marinade until the tofu is coated. Set aside for 10 minutes to let flavors incorporate into the tofu. Then sprinkle the tofu with the sesame seeds.

6. Assemble the bowls. Divide the cooked vermicelli noodles equally into four bowls. Top the noodles with the bowl filling ingredients and the tofu, sectioning the ingredients if desired. Drizzle with the peanut sauce and garnish with mint, peanuts, cilantro, and lime wedges.

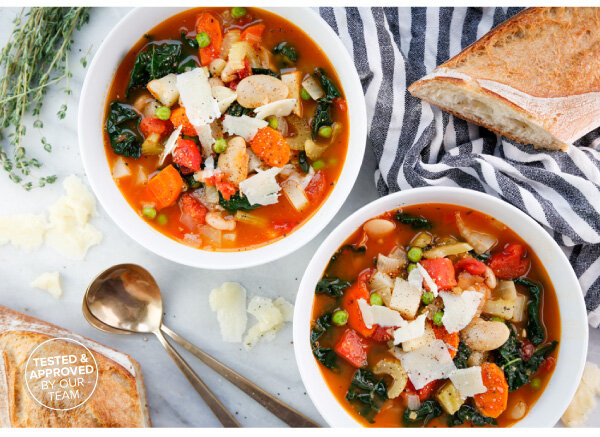
Classic Minestrone Soup

Lia Soneson

 
Minestrone_v2_01.jpg

Minestrone, a classic Italian soup, features a wide range of  vegetables, beans, and pasta. Our recipe version focuses on techniques for building great flavor in stages. The result? Deep, rich, satisfying tastes and textures without being over-cooked. You’ll find this soup highly flexible – use seasonal vegetables, or whatever you have on hand.  We think you’ll agree that this minestrone easily earns its reputation as a healthy, winter comfort food.

Comforting Minestrone 

Soup Serves 4 - 6

Ingredients:
4 tablespoons olive oil
1 yellow onion, diced
3 celery stalks, dice
2 carrots, cut on the bias into slices
2 small potatoes, cut into 1/2" cubes
3 cloves garlic, minced
1/2 tablespoon tomato paste
2 bay leaves
1 Parmesan cheese rind
1 can (28 oz) diced tomatoes
6 cups vegetable broth
1 can (15.5 oz) Great Northern beans
1 can (15.5 oz) butter beans
1 cup ditalini pasta (or other small pasta)
1/2 teaspoon Kosher salt
1/2 teaspoon pepper
2 sprigs fresh thyme
1/4 teaspoon red pepper flakes
1 tablespoon red wine vinegar
1 cup frozen peas
3 cups chopped kale
Parmesan cheese, shaved, for serving

Directions:
1. Start by making the mirepoix. Heat the olive oil in a large Dutch oven over medium-high heat. Add the onions and sauté for about 3 minutes until softened. Add the celery and carrots, and continue to cook for another 3-5 minutes, or until softened.

2. Add the potatoes and garlic and continue to cook for another 5 minutes. Stir in the tomato paste.

3. Add the bay leaves, Parmesan rind, canned tomatoes, vegetable broth, Great Northern and butter beans, ditalini pasta, salt, pepper, thyme, and red pepper flakes. Bring to a boil over medium-high heat.

4. Reduce the heat to medium-low and simmer the soup for another 20-25 minutes. Use tongs to remove the Parmesan rind, bay leaves, and thyme stems.

5. Stir in the red wine vinegar, frozen peas, and chopped kale. Cook for one more minute, or until the kale just begins to wilt. Serve with shaved Parmesan cheese as a garnish on top.


Manchego and Thyme Popovers

Lia Soneson

 
Popovers_v2_01.jpg

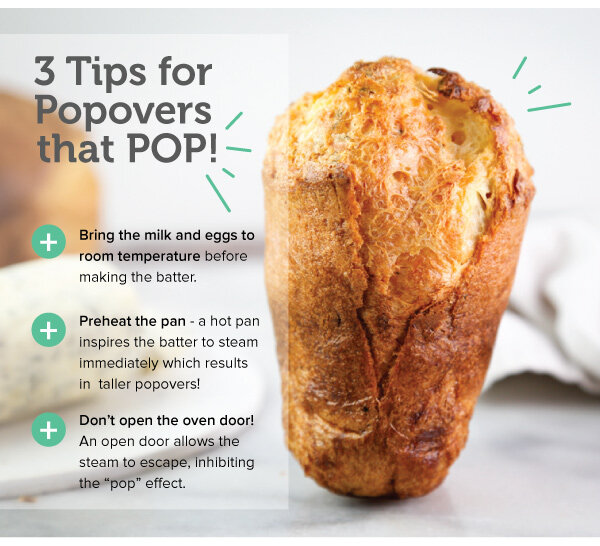
Popovers are impressive, high-rising rolls with a soft, airy inside and a crispy, crunchy exterior. These delectable morsels are meant to be enjoyed freshly baked straight out of the oven. IN THIS ISSUE, we feature Manchego and Thyme Popovers with an Herb Butter that would be enjoyably delicious as a savory breakfast, or as a side at lunch or dinner! 

Manchego and Thyme Popovers with Herb Butter
Makes 12 popovers

Popover Ingredients:
1-1/2 cups all purpose flour
1 teaspoon Kosher salt
1/2 teaspoon fresh ground black pepper
1 tablespoon fresh thyme, finely chopped
4 large eggs, room temperature
1-1/2 cups whole milk, room temperature
1/2 cup Manchego cheese, finely grated
2 tablespoons unsalted butter, melted (for greasing the popover pan)

Herb Butter Ingredients - makes 1/2 cup
1/2 cup (I stick) unsalted butter, softened to room temperature
1 garlic clove, minced
1 tablespoon fresh sage, finely chopped
1 tablespoon fresh rosemary, finely chopped
1/4 teaspoon Kosher saltPopover

Directions:
1. Preheat the oven to 450°F. Place the empty pan in the oven while it preheats.

2. In a medium bowl, combine the flour, salt, and pepper and mix with a fork for about 30 seconds to incorporate evenly. Add the thyme and continue mixing until evenly distributed.

3. In a large bowl, whisk the eggs and whole milk together until contents are frothy, about 5 minutes.

4. Slowly add the flour mixture to the egg mixture and continue whisking until all the ingredients are combined and the batter is the consistency of thick cream. (Try not to over whisk!) Stir in the cheese.

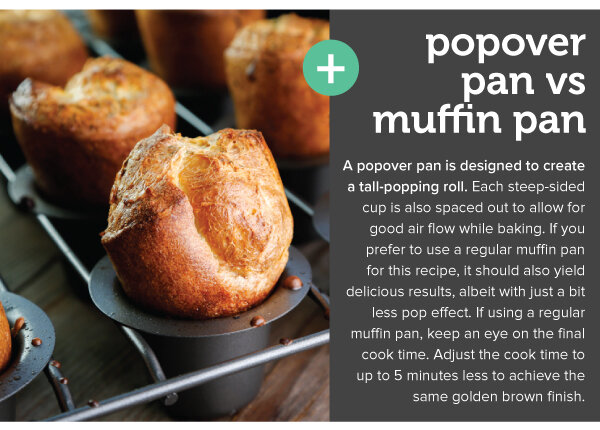
5. Remove the preheated popover or mun pan from the oven and brush the cups with the melted butter. Fill the cups 3/4 full with the batter. Bake the popovers on the lowest rack for 20 minutes. After 20 minutes, reduce the temperature to 350°F, ensuring the oven door stays closed so no steam escapes (this is crucial to getting the pop effect!). Continue to bake for another 20 minutes, or until golden brown.

6. Remove popovers from the oven and serve hot with herb butter. If not serving right away, remove popovers from the pan and cool on a wire rack immediately to keep that delightful crunch!

Herb Butter Directions:
1. In a small bowl, combine all of the ingredients together and mix with a fork or a hand mixer until the herbs and garlic are distributed evenly.

2. Transfer the butter onto a sheet of plastic wrap and roll into a cylinder. Twist the ends of the plastic wrap tightly and refrigerate for at least one hour until cold and solid.

3. Serve herb butter alongside warm popovers in a small dish. Butter is best when enjoyed within 1 week, but can be frozen for up to two months. To freeze, simply wrap the plastic wrapped butter in parchment paper and freeze in a freezer bag, removing excess air. Extra herb butter? Heat and drizzle butter over homemade popcorn or add to baked potatoes.


Bold flavors in a light spring soup!

Lia Soneson

 
LeekSoup_v1_01.jpg

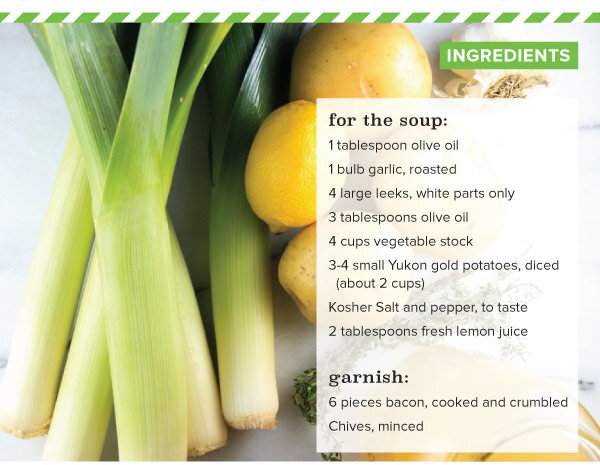
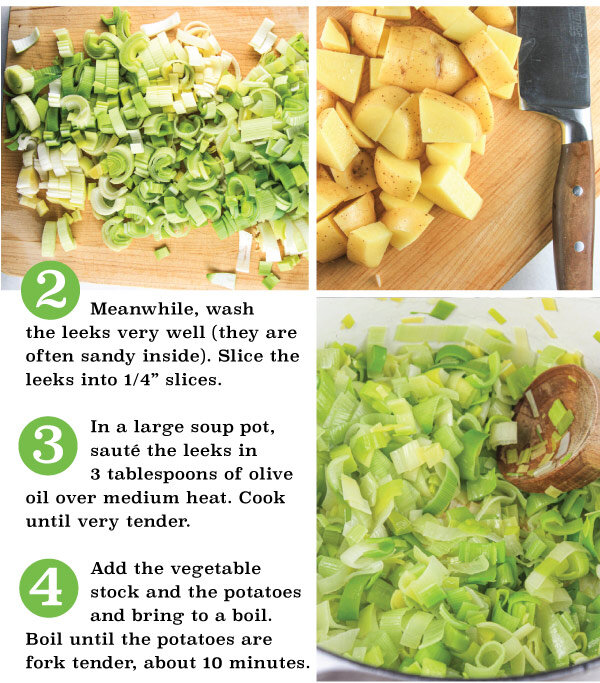
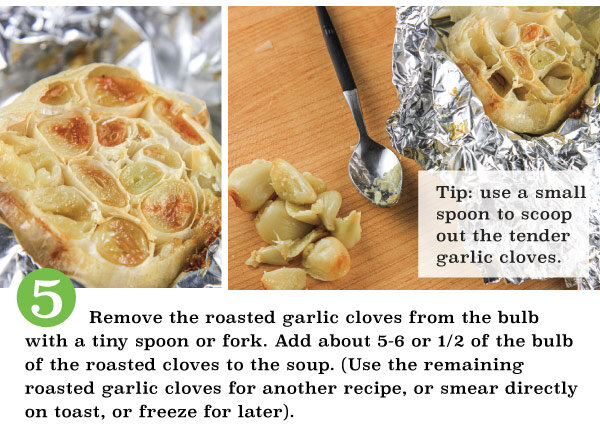
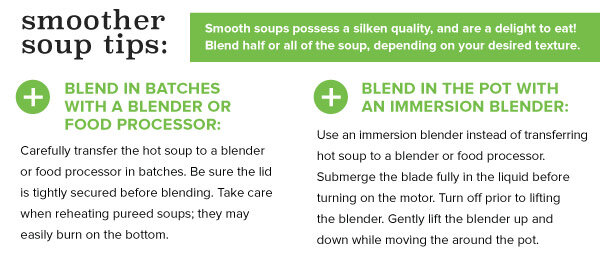
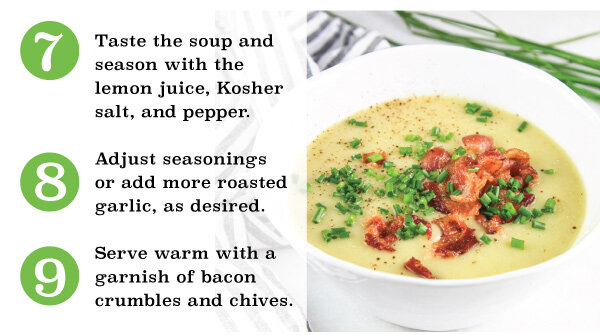
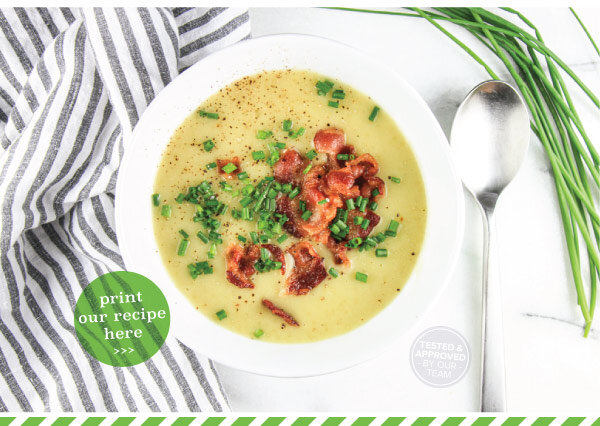
Perfect for a first course or a lovely spring lunch, this savory soup features the bold flavors of roasted garlic and tender spring leeks. The creamy texture is achieved not with cream or butter, but with Yukon gold potatoes and a powerful blender. The crispy bacon garnish adds the perfect salty crunch to each spoonful.


Fresh Inspiration! Huevos Rancheros for Breakfast, Lunch, or Dinner

Lia Soneson

 
Huevos_Rancheros_v2_01.jpg
Today we’re featuring flavor-rich huevos rancheros. It’s a great dish to enjoy for any meal of the day. This classic Mexican breakfast translates to “ranch eggs” and highlights a perfectly fried egg served on a warm tortilla with black beans, cotija cheese, and fresh pico de gallo. Enjoy!
 

Easy Pasta Dinners from the Pantry

Lia Soneson

 
1Pasta2020_v2_01 copy.jpg

A good pasta dish transforms everyday, pantry ingredients into something extraordinary for any day of the week. IN THIS ISSUE, we present three of our easiest to implement pasta dishes that deliver big on flavor and satisfaction! Buon appetito!
 

A Good Time to Have Brunch In!

Lia Soneson

 
Brunch2020_v3_01.jpg

There is no better time than the present to brunch . . . IN! If breakfast is the most important meal of the day, brunch is the most fun! Brunch implies a leisurely sort of day — where our schedules are less relentless and time together is well spent. Whether you spend it with family or a few good friends, we've composed a foolproof menu worth celebrating.

IN THIS ISSUE, we feature a Caramelized Onion, Mushroom, and Parmesan Quiche, Macerated Citrus Salad, and a side of Orange Poppyseed Bread.


Super Snacks! Three Mediterranean Dips

Lia Soneson

 
Med_Dips_v1_01.jpg

These Mediterranean dips are perfect for a healthy snack, light meal, or a game time party! IN THIS ISSUE, we feature three easy dips made to share - a very creamy classic hummus, a rich, roasted red pepper and walnut dip called Muhammara, and a smoky Baba Ganoush. Time to kick off a little delicious dipping!